How to Style any Dresser or Entryway Table

An entryway table is the first thing you see when you and your guest walk into your home. A dresser located in a bedroom acts in the same capacity depending on the arrangement of the room. These two furniture pieces are essential to creating an inviting atmosphere into one’s home. That means one should take the time to arrange it in a way that is aesthetically pleasing and in a way that adds personality to the space. First impressions are everything, so this post will guide those who are eager to revive an existing table or those wanting to purchase an entryway table or dresser.

There are 5 main components to creating the perfect ambiance for a dresser or entryway table. That includes books, a mirror, a vase with greenery, a basket (if possible), a catch all bowl, and a seasonal accent piece.

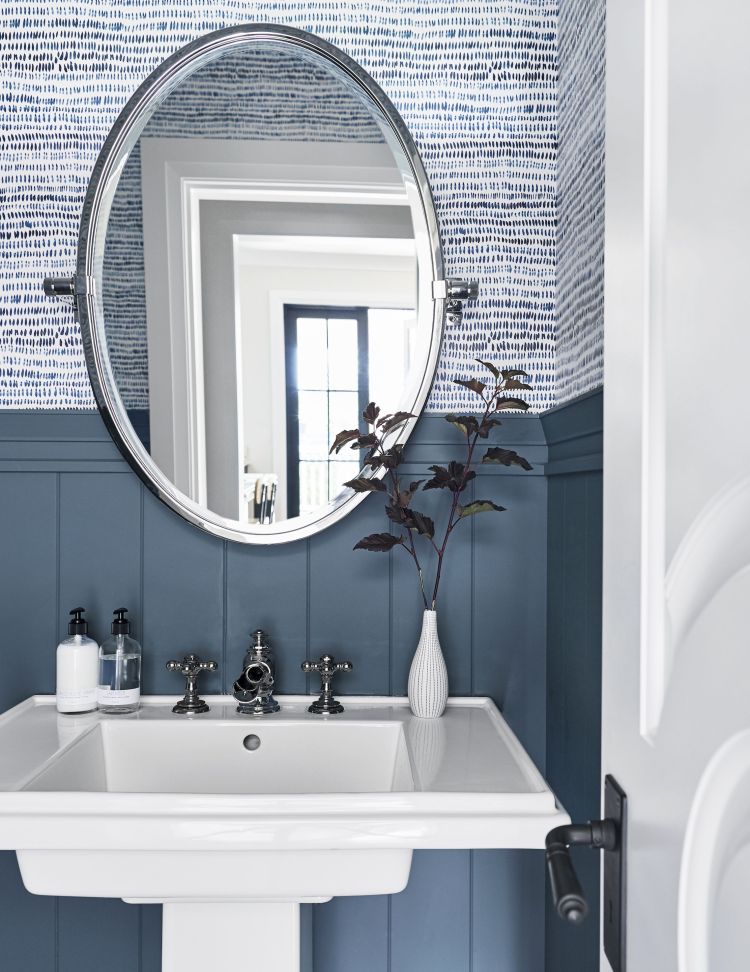
Depending on your style, the mirror you choose will dictate the color, style, and texture of the other pieces. This is very important considering the fact that you want all of the items to compliment and mesh with one another. I found that a round mirror is more flattering and comes in more variety than a square mirror. Another thing with the mirror is its placement. It can either be hung above the dresser/entryway table or it can be propped on the table. This is a personal decision that is determined by where you want your eyes to fall when looking at the collection of items. Both positions have their advantages but it ultimately depends on the space.

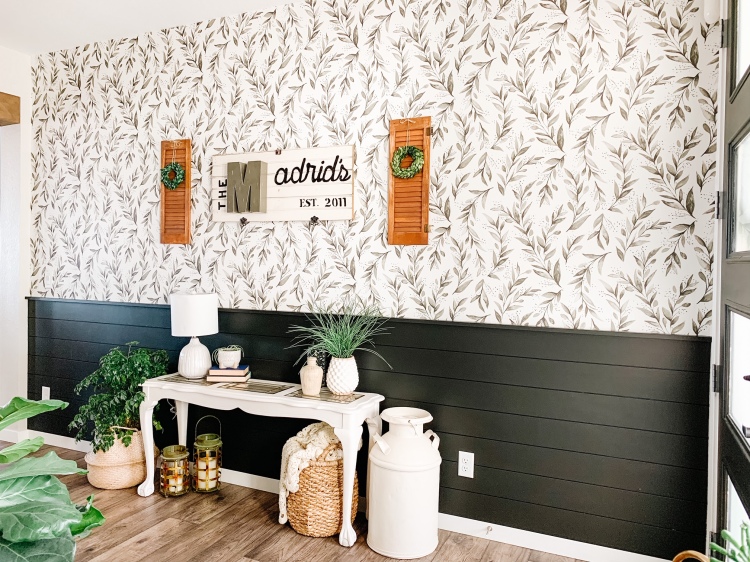
Books add height and visual interest to the table. Black books are often the go to because they are modern and sleek. It doesn’t have to be some expensive Tom Ford or Chanel book because you can remove the sleeve of any hardcover book to get the same effect. Ideally, the books should be different sizes so it can mirror a pyramid. The books also provide a good platform for a “catch-all bowl.” This bowl is for keys, earrings, wallets, a name-tag, and any small, miscellaneous items that need a place to live.

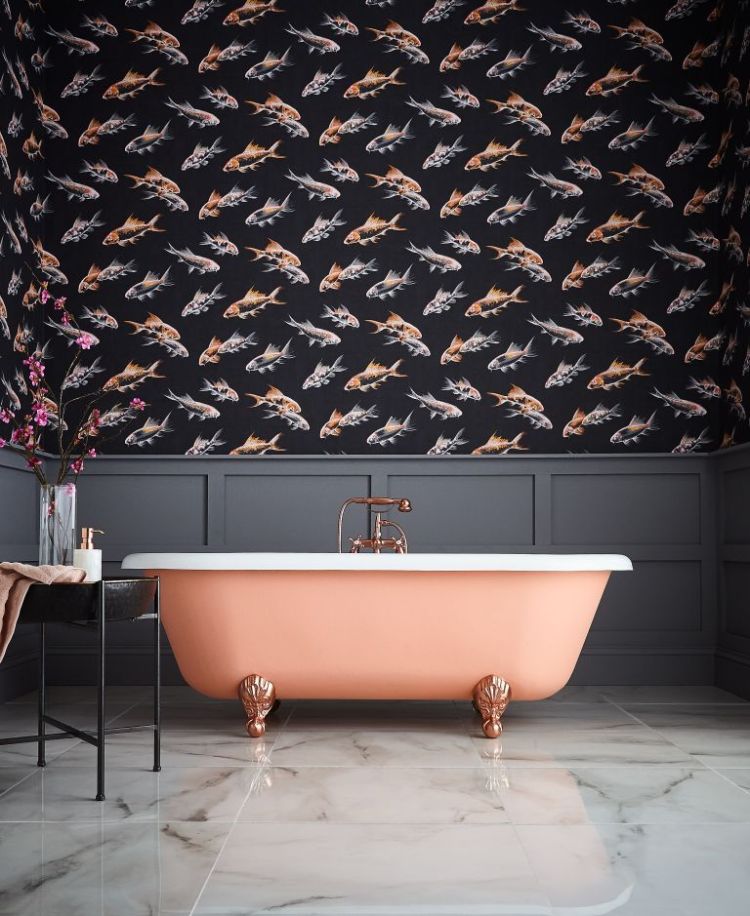
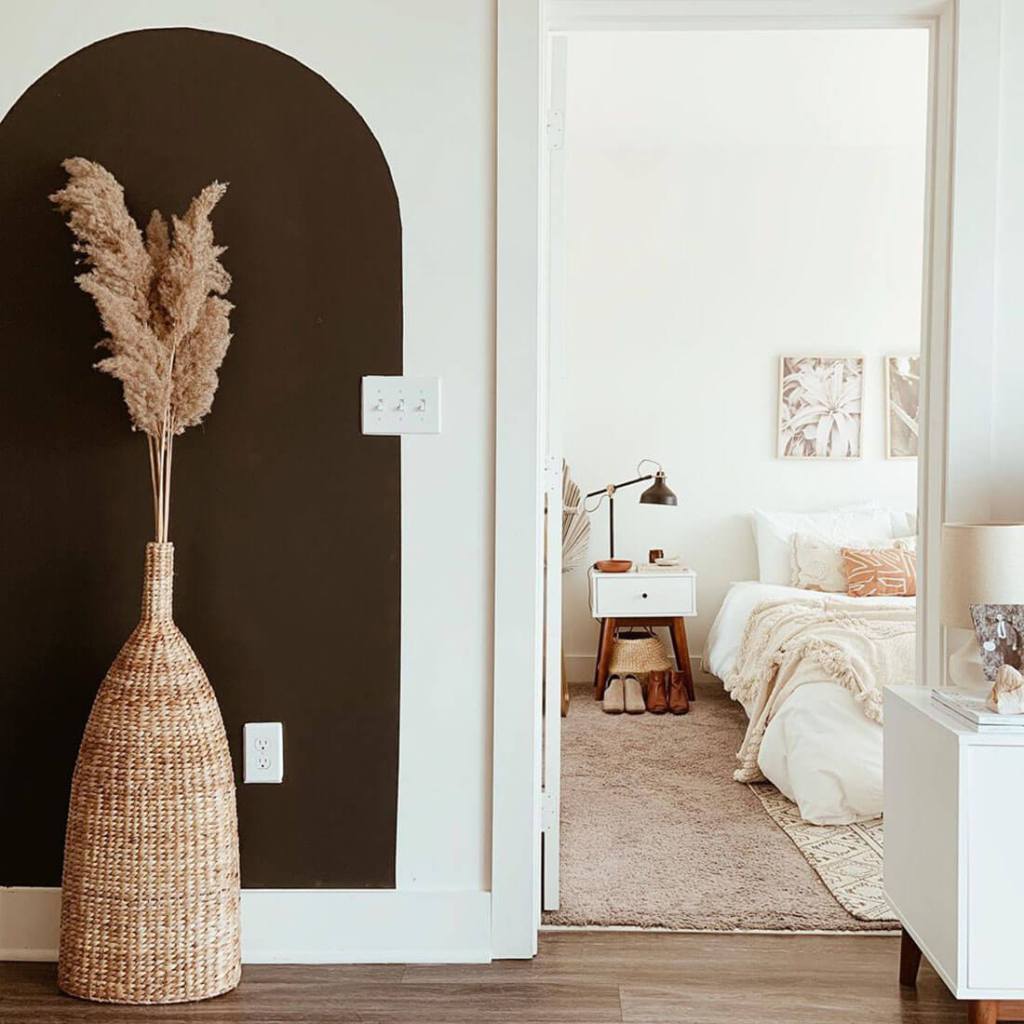
The most important item is the vase and greenery. Chunky vases often work well with this set up, but any vase will work. Pick your favorite and go from there! There are a variety of faux plants but I say the bigger the better. Pampass Grass and Eucalyptus are my personal favorite, because they are unique.

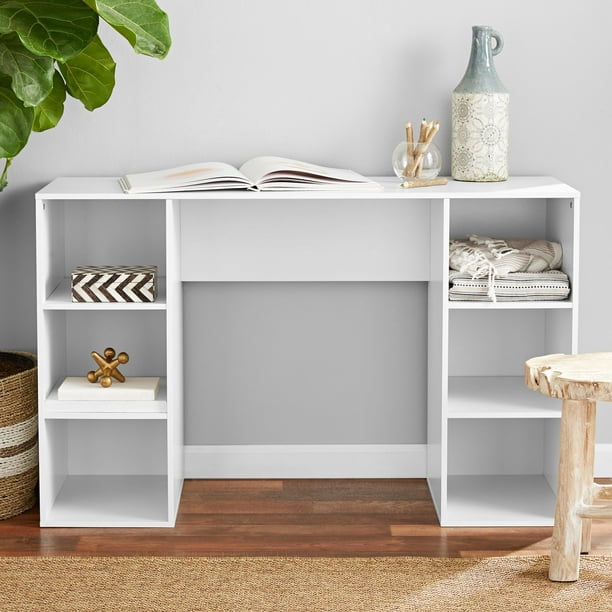
Dressers usually don’t have an opening at the bottom, so this portion will strictly be for an entryway table. An entryway table often has space at the bottom that can be used for cute, woven baskets. This is a good place to keep blankets, dog toys, and extra decorative pillows.

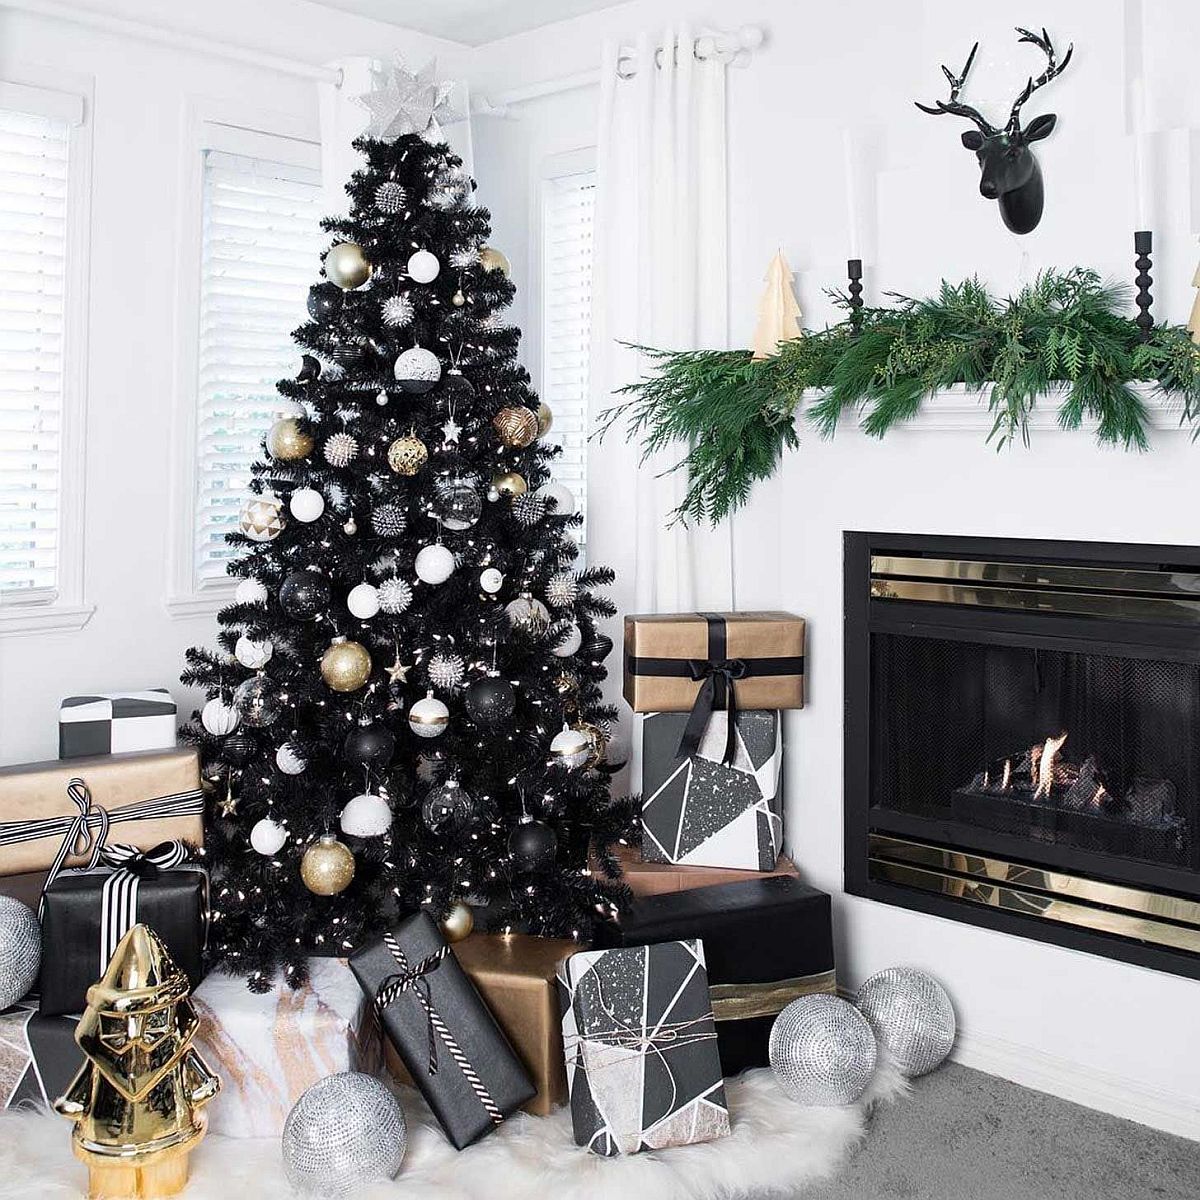
Whether it’s a mini tree for Christmas or a pumpkin for Halloween, a seasonal touch will be the last step in the styling process. This final process will tie in the time of year and mesh perfectly with the other elements.

A Moody Christmas

introducing dark and moody colors to your Christmas decor arsenal

Every once in a while the traditional dark green Christmas tree gets boring. There’s different ornament and decor pieces that can temporarily make your Christmas arrangement pop, but there’s nothing like a “moody Christmas.” A moody Christmas refers to holiday decor that are muted and dark but still emit the holiday spirit.

The tricky thing about incorporating dark colors with Christmas is that it’s a thin line between moody and too dark. When executed to perfection the muted Christmas decor creates a unique space for the most wonderful time of the year.

These tips and decor items will ensure that the dark pieces will not dampen the Christmas holiday.


An essential piece of any Christmas decoration starts with the tree. In recent years there have been a variety of colored faux trees that have hit the market. The most bizarre one I’ve seen is a bright pink tree in Big Lots. In this instance the most appropriate tree color would be black. The black tree will set the tone of the space especially since everything matches black. Thus, there are a lot of color combinations that will be intensified and complimentary to the black tree.

Naturally a Christmas tree needs ornaments and the hardest decision in this process his choosing its colors. Gold and red particularly look wonderful with a black tree, but there are some other options to achieve an alternative look. It’s an odd combination but pale blue, green, gold, and white ornaments are a good fit for the muted look. Also dark blue/black with silver (like this set at Target) would make for a wonderful addition.

A good way to lighten up the black tree is with white accent pieces. A white or ivory stocking is a nice way to brighten up the space. These two stockings from target are simple, elegant, and cute.

Going along with the white theme, these accordion like Christmas tress would be a good addition to an entryway table, coffee table, or mantle. It also brings in a nice texture that brings visual interest in the space.

Scroller Image

Easy DIY: Bohemian Hanging Shelf

A quick $12 DIY

Hanging plants and hanging shelves are essential to brining a bohemian feel to any space. The warm tone of the wood compliments the ivory string that keep the shelf afloat. They can’t hold much weight, but an artificial plant, a light book, and a picture could fill up the shelf in no time. Some of the most expensive hanging shelves can cost up to $50, but this inexpensive DIY will only cost you $12-$15.

All you need for this project is: wood stone, your choice of wood, string, and an embroidery hoop. Some of this stuff can be found at your house or your local Walmart or Lowe’s.

Step 1

Choice your desired color of wood stain, and stain your wood. Make sure to evenly distribute the stain by using a rag to consistently apply it with a swift back and forth motion. This is very important because if you erratically apply the stain it will be obvious in the outcome. 5 minutes after applying use a clean rag to wipe of any excess stain.

Step 2

Drill four holes at each corner of the wood, and try to make them equally apart.

Step 3

Cut eight pieces of string to 18 inches, put the pieces together, and insert the string in the embroidery hoop. The pieces of string should hang evenly on each side of the hoop. Create a tight knot (like seen in this video), and Section off 4 pieces of string for each of the four holes. Then use the four pieces of string to make a square not (like is seen in the video or the picture below. This will be done for all four sections until the desired length. At this point you can add beads, or other accessories, to make the shelf your own.

How to Macrame: Get Started with this Easy Beginner's Guide

Step 4

After the square knots are done, put the strings in their respective holes. Hold all the pieces of string and tie a traditional knot underneath the plank of wood. Leave or cut the excess string.

Step 5

TA-DA! The shelf is complete and now it’s time to decorate and style. I decided to create an aesthetically pleasing wall in my office corner, but it can really go anywhere. You can make two of them and have them above your television or it could go over be added to a gallery wall. I opted to only add a faux plant to my shelf, but a picture and or some books can be added.

Picture by me of my small office set up

The Wonderful World of Sconces

Sconces are mostly seen in pairs placed on each side of the entrance of an house, but they have the ability to be placed anywhere. For those unaware, sconces are wall-mounted light fixtures that can be used indoor and outdoors. Sconces have so much versatility because they come in different shapes, sizes, and colors. In this blog post I will be sharing some of the most unique sconces, where you can find them, and how to style them in your hone.

  1. Classic Globe

This round sconce is classy with its black and gold accents. One of the benefits of it being orb shaped is that the light inside will appear has a warm tint from the outside. This will not emit much light, so the best place for this sconce is on both sides of a headboard or the bathroom. In a bedroom this can act has a night light or a reading light. In terms of style this will fit best in a modern or bohemian modern space because of the clean design.

George Kovacs - Alluria 1-Light Weathered Black with Autumn Gold Accents Sconce
Can be found at Lowes.com

2. Who said Sconces can’t be Fun?

This sconce is everything fun and electric. Everyone will not be gravitated to pick such a bold light but it is perfect if one wants to get out of their decor comfort zone. This gold/brass light can be found at World Market for $59.99. Any bedroom, office, or living room would be delighted to have this piece of decor. This would fit best behind a black, or dark, wall for an edgy look or a bright white space that lacks color and personality.

Brass Starburst Two Light Logan Wall Sconce by World Market
photo from World Market

Wayfair

3. Modern Farmhouse

There has been a recent trend revolving around modern farmhouse that combines rustic with modern. One would think that the two would clash but it is a really interesting to clash styles into something beautiful. This sconces has a long, vintage bulb that is almost the same length of the fixture. The exposed bulb gives it a rustic, homey fell while the picture itself is abstract and modern. It also comes in a warm brass and polished nickel color. This would be perfect in an entryway, on both sides of the door, or outside on the patio. This sconce can be found on Wayfair for $122.

Dineen 1 - Light Dimmable Flush Mount

Optimizing a small office space

A guide on how to make the most out of your small office

COVID-19 has brought about many changes in the world and the most prevalent is employment. A lot of people lost their jobs due to the virus and others had to go remote for a long period of time. According to World Economic Forum,

The COVID-19 pandemic and the resulting lockdown caused 114 million people to lose their jobs over 2020. Those who didn’t loss their job most likely worked remote and are still doing so if they have not transitioned back into their office.

With the sudden increase of remote work, more people are working from home. Everyone is not fortunate to have a home office, but they have a small section of their house or apartment dedicated for a work. Having a clean, clutter-free, desk is important for productivity, but that can be difficult for people with a smaller office or desk. 

In this guide I will be detailing a view tips and tricks that will maximize any small office, to increase productivity and to make the space your own. 

  1. Peg Board 

Peg boards are usually used to hang tools in the garage, but it can also be effective in an office space. With peg boards you have the option to purchase shelf add to hold things like pens, pencils, paper clips, and sticky notes. This can be beneficial when trying to declutter your desk and to have room for monitor(s), keyboards, and mouses. Aside from it being effective, it can be painted to bring any dull office space to life! When you have a small desk, it can be limiting, but a wall can be used to increase productivity by removing clutter.  

White Bello Pegboard | The Container Store
photo from the Container Store website
  1. Risers/Stand

If you want to add height to your monitors and make more space for your other items, a riser/stand might be what you need to buy. They come in different shapes with varied material, but they both provide space under your monitor or laptop. Positioning your computer screen is not just for looks, but important for neck and back pain. According to View Sonic, “Position your computer screen at a poor angle for long enough, and you could find yourself experiencing neck pain and possibly even damage.” The riser ensures that your computer is at eye length to prevent poor posture and back pain during your 8 hour shift.

Wooden monitor stand - iMac Computer shelf | Oakywood
photo from Okaywood.com
  • Cubbies

Some desk already have a cube storage area for additional space and that can be helpful if you need multiple things by your desk. Some sections can have small decor pieces (as seen below) and others can be filled with work related items. Even if you don’t want it to be seen, there are collapsable bins made specifically for cubbies.

Mainstays 6 Cube Storage Computer Desk, White
photo by Walmart.com (mainstay collection)

DIY Flip or Flop: Renovating my Television Stand

On one faithful day while I was casually watching One Tree Hill— I had an epiphany. I really hate my TV stand. I hated how their was no privacy, or no doors, to hide my junk that had no other place to go. This is one of the many cons that come with living in a small apartment and can easily make any space feel cluttered. My solution to this problem was to assemble stylish cabinet doors that would match my new decor and close off my things. This is usually how I go about renovating a piece of furniture in my apartment because it gets to the point where I can’t stand to look at it any longer.

Like I mentioned in a previous post, Rattan Cane is a trend that can be used for various things. Even though Rattan is very popular, it is very hard to find in-store unless you live near a cane shop. Unfortunately I couldn’t find cane, so I opted for its look alike, which is burlap. Unlike cane, burlap is more fragile and does not have the shrinking abilities that result in the tight finish.

The next stop was Lowe’s for the cabinet hardware, wood for the frame of the cabinet, and black paint. Obviously there are different different shades and finishes of black, but I opted for the Valspar Black Tricorn in semi glossy.

I am no handy man, but the diy itself was fairly easy because it’s essentially measuring the size of the opening and screwing them together. Me and math don’t get along, so my measurements were a bit rough, which led to lots of resizing. Not to mention, this was my first time painting and I don’t think I did too shabby.

The only downside to the project is that the burlap is semi see through and can be easily punctured if one is not careful. Other than that it has been a great addition to my small room and has been aesthetically pleasing to look at when watching television.

The How-to Guide on Making the Coziest Bed

The “science” behind it all

photo from google

There is a secret as to why hotel beds look so luxurious and comfortable, and it lies in how the bed is layered. The problem with most beds are that they only contain the basics: Fitted sheet, regular sheet, comforter, and a throw blanket on top. The result of this combination is a dull and lifeless bed that needs a lot of tlc.

Some say there is an exact science to the art of layering, so below I have provided some steps and material on how to assemble the perfect bed.

Material:

  • Mattress
  • Fitted Sheet
  • Regular Sheet
  • Down Comforter
  • Quilt
  • Duvet cover
  • 2 Comforters
  • Throw Blanket
  • 2-4 King size Pillows
  • Decorative pillows

Step 1:

After the sheets have been properly placed on the bed the next layer is a quilt. The quilt adds texture and height for the for the duvet to lay on and also extra cushion for supreme coziness. The color of the quilt depends on your color scheme, but white or off-white often does the job. This quilt from Pottery Barn is an ideal quilt to consider since it has a variety of colors, thick, and has a unique checkered pattern.

Photo from: https://www.potterybarn.com/products/cloud-linen-handcrafted-quilt-shams-flax/?catalogId=84&sku=3473863&cm_ven=PLA&cm_cat=Google&cm_pla=Bedding%20%3E%20Quilts%20%26%20Coverlets&cm_ite=3473863&gclid=CjwKCAjwy7CKBhBMEiwA0Eb7ag7qEUuT_yevTnzLbcBWHnGEjYDWDoh6-FoXj-z2xf4bTsuFCrWljBoC-c4QAvD_BwE

Step 2:

Out of all of the steps the most important is concerning the duvet cover. For those who are unaware, a duvet cover is a thin cover that requires an insert of a comforter. This is convenient because it is easier to wash and serves as a protective layer if one is trying to preserve an expensive comforter. The trick with the duvet is add two comforters instead of one—this may be difficult, but the outcome is worth it. The goal is to use two of the fluffiest comforters you can find, so the duvet appears full when placed on top of the quilt.

Step 3:

There are 3 ways to fold your duvet, or comforter, and all of them depend on preference, style, and pillow arrangement. Of your a pillow hoarder like me, the half fold provides enough space for pillows and makes the duvet appear bigger. It also will showcase your quilt (from Step 1), as seen in the photo below.

Step 4 &5

Pillows, pillows, and more pillows. There are countless ways to assemble your pillows, but an important tip is to acquire King size pillows—no matter the size of the bed—to make your bed appear bigger/wider. Once the pillows are set to your liking, the last step is to throw your blanket of choice over the duvet. Chunky Knit blankets with warm tones are a great addition to any bed


I hope this post has inspired you to revamp your bed just in time for the chilly, Autumn nights. 🍂

4 ways to incorporate Wallpaper in your space

Wallpaper is an affordable way to spice up your living spaces without the hassle of painting or finding an oversized portrait to fill a big wall. Even though this may be the case, wallpaper has always had the stigma of being cheap and tacky. This is understandable considering the horrid design of certain wallpaper that include: cats, dreary patterns, and dingy colors that remind you of your grandmother’s 50 year old house. 

For some people this stigma still applies, but recently there has been a trend that involves the use of wallpaper to elevate a space or a piece of furniture. This has a lot to do with new prints and interior designer influencers finding creative ways to incorporate wallpaper to their projects. 

One of the great things about wallpaper is how temporary it can be with the peel and stick option. This is great for anyone that is renting an apartment, or house, or someone who wants to switch it up every once in a while. 

In this post I will be showing different ways to upgrade your space using wallpaper and displaying some popular patterns that anyone can find.

1. Half Wall

A full wall covered in wallpaper can seem overwhelming depending on the patten and the size of the wall. Just imagine having a room covered in wallpaper—this would be disatrous if you ask me. So, this is where the half wall method comes in. Only covering half of the wall allows any space to have a little more character and leaves an opportunity to do something fun on the remaining portion of the wall. For instance, in photos below the designer of the two spaces decided to use shiplap and wall molding to provide some additional texture to the wall. Even if you live in an apartment, there are products like peel and stick wall molding and shiplap held up by command strips that can get the job done. 

2. Chic Archway 

A popular trend that has graced the site of every interior designer’s Tik Tok, Youtube, and Instagram is something I like to call the chic archway. Even though it’s not an archway, this painted arch has the ability to add a little character without the architectural burden. Whether it’s lightly painted or darkly painted, this arch can transform any room into a boho dream. Some people don’t have the option to paint or would prefer the connivence of using—you guessed it—wallpaper. With your wallpaper of choice and an X-acto knife, this bohemian style arch could act has a headboard or a simple way to spice up a wall. 

Photo from: https://littlegoldpixel.com/painted-arch-walls/

3. Jungle Fever 

Plam trees + Wallpaper = the perfect bathroom accent wall. For some reason palm trees and bathrooms just go together and I have never seen it poorly executed. For the bathroom you have the option to either go with the traditional green or the muted tones in the palm trees. The green is obviously the more vibrant option that could be matched with gold accents, similar to the photo below, paired with a white, textured shower curtain. On the other hand, with the muted tones there are endless options when it comes to decor, accent pieces, and more. 

4. Vintage 

The saying goes, “there’s nothing new under the sun” and most of the trends now are things that were once popular in the 70s, 80s, and 90s. That’s a big reason why thrift stores are so popular and why there seems to be an obsession on all things vintage. So, out of all of the different wallpaper options, vintage wallpaper is the one with the most variety. This is simply because it can be mixed with modern or vintage pieces that would equally blend well with the wallpaper. If vintage wallpaper is styled right, it could make for a unique space that is unlike any other room. 

photo from:https://www.housebeautiful.com/design-inspiration/g27010127/most-iconic-wallpaper-designs/

Wallpaper has come along way from just being a cheap and tacky piece of paper being applied to a wall. There are many stylish options, that were lacking before, and many ways it can be used.

Introduce Yourself (Example Post)

This is an example post, originally published as part of Blogging University. Enroll in one of our ten programs, and start your blog right.

You’re going to publish a post today. Don’t worry about how your blog looks. Don’t worry if you haven’t given it a name yet, or you’re feeling overwhelmed. Just click the “New Post” button, and tell us why you’re here.

Why do this?

  • Because it gives new readers context. What are you about? Why should they read your blog?
  • Because it will help you focus your own ideas about your blog and what you’d like to do with it.

The post can be short or long, a personal intro to your life or a bloggy mission statement, a manifesto for the future or a simple outline of your the types of things you hope to publish.

To help you get started, here are a few questions:

  • Why are you blogging publicly, rather than keeping a personal journal?
  • What topics do you think you’ll write about?
  • Who would you love to connect with via your blog?
  • If you blog successfully throughout the next year, what would you hope to have accomplished?

You’re not locked into any of this; one of the wonderful things about blogs is how they constantly evolve as we learn, grow, and interact with one another — but it’s good to know where and why you started, and articulating your goals may just give you a few other post ideas.

Can’t think how to get started? Just write the first thing that pops into your head. Anne Lamott, author of a book on writing we love, says that you need to give yourself permission to write a “crappy first draft”. Anne makes a great point — just start writing, and worry about editing it later.

When you’re ready to publish, give your post three to five tags that describe your blog’s focus — writing, photography, fiction, parenting, food, cars, movies, sports, whatever. These tags will help others who care about your topics find you in the Reader. Make sure one of the tags is “zerotohero,” so other new bloggers can find you, too.

Design a site like this with WordPress.com
Get started